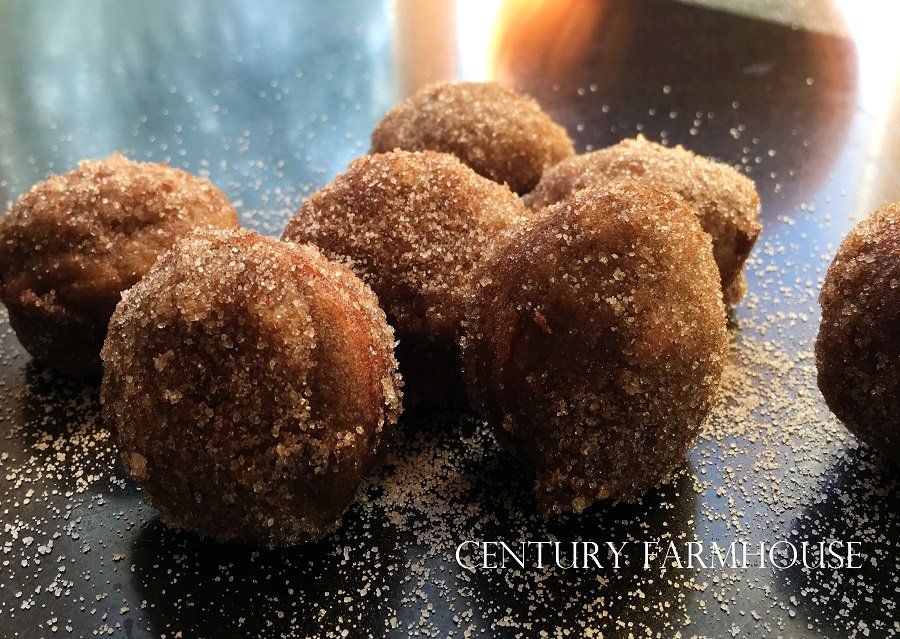
Gluten Free Gingerbread Doughnut Holes
Made with apple cider and roasted pumpkin. Oh my!
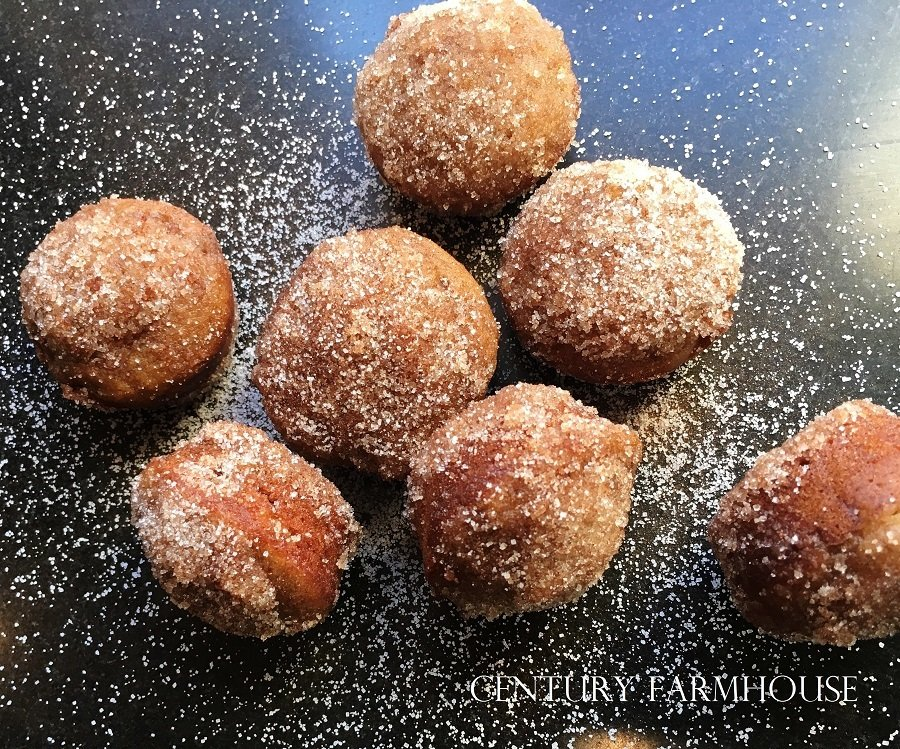
Don't you wish you could lick the sugar off the photo? Don't you wish you could pop one of those doughnut "holes" into your mouth and savor it? I can tell you that they are light and fluffy and indescribably delicious - they are buttery and sugary and have a little zing of ginger when you plop them into your mouth... and
they are gluten free! Let me tell you how I came to be making these melt-in-your-mouth treasures; it all started with a photo I saw on Instagram.
I can spend a lot of time on Good Old Instagram, and last week when I saw a beautiful photo of gingerbread doughnuts, I was pulled in and HAD to make them. The photo was posted by the magazine Where Women Cook
, celebrating the Gingerbread Donuts created by Haley D. Williams who writes the blog If You Give a Blonde a Kitchen
. Here's her original recipe.
Many thanks to Haley for her permission to credit her work here.
In my true style of not being able to leave a perfectly good recipe alone, I started playing.
In our house we have found that gluten free baking is easier to digest, and I have begun adapting recipes to fit our changing eating habits. Below you will find my adaptation of Haley's doughnuts, and they are utterly delicious. As a matter of fact, before I had finished baking the batch I had eaten at least one of the precious yummies and about 4-5 of her little friends as well. I had no willpower. I apologize for my pigginess in advance. Ha.
Here's my recipe...
Gluten Free Gingerbread Doughnut Holes made with Apple Cider and Roasted Pumpkin
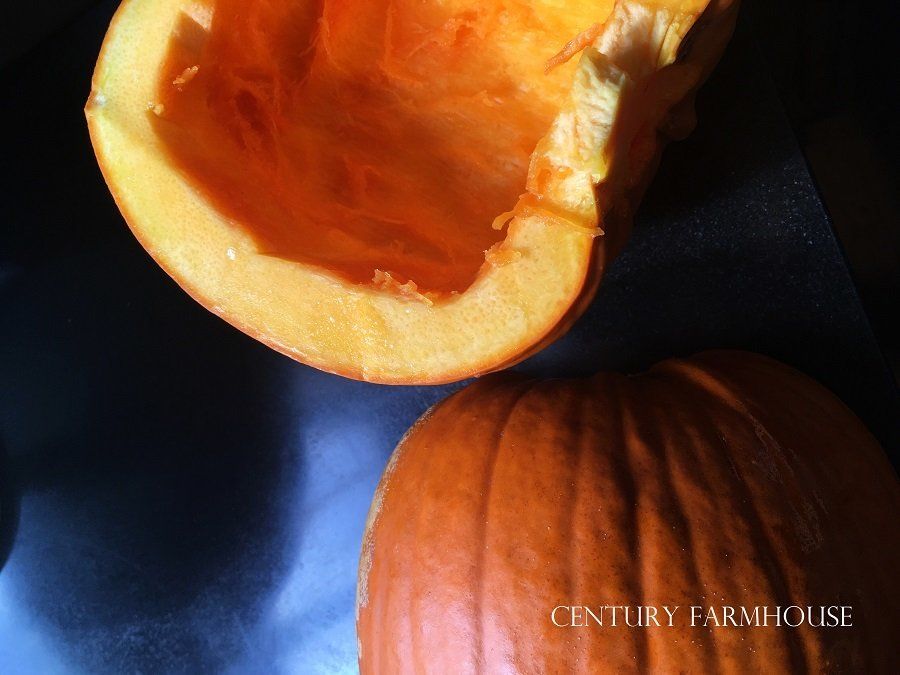
Planning an extended baking session included stopping at the Farmers' Market on Saturday morning to pick up some fresh apple cider and a few pie pumpkins. I started by roasting a pumpkin. Here's how:
1. Wash the pumpkin, cut it in half with a very sharp knife, scoop out the slippery guts and the seeds (save the seeds to roast later!).
2. Place the pumpkin halves cut side down in a roasting pan and add about 1/2 inch water
3. Bake at 350 degrees F. for about 2 hours (depends on the size of the pumpkin, this one was about 8 inches in diameter)
4. Poke a fork into the pumpkin to test for doneness. If
the fork
slides in easily, remove the pumpkin from the oven and allow it to cool (at least to be able to touch it) before scooping the flesh from the peel.
5. Mash with a potato masher to a smooth consistency. It is now ready for pies, cookies, breads, and doughnuts!
6. Don't want to fuss with the pumpkin fresh from the field? Open a can!! This recipe doesn't need much pumpkin, so have a plan for the rest of it too.
OK. Let's get serious about the doughnuts - that's why you're reading this, right?
Equipment:
two mixing bowls, whisk, measuring spoons & cups, teaspoons, table knife, mini-muffin tin, cooling rack
Prep time:
10 minutes (after that pumpkin-roasting marathon)
Bake time:
10 minutes
Yield:
36 doughnut holes (mini-muffins)
Ingredients:
1 1/4 cup Bob's Red Mill 1:1 gluten free flour (Nope, I don't have a deal with Bob's Red Mill, I just really like working with this flour)
1/4 cup instant dried milk powder
1 teaspoon ground cinnamon
1 teaspoon ground ginger
1/4 teaspoon ground cloves
1/4 teaspoon ground allspice
1/2 teaspoon baking powder
1/2 teaspoon baking soda
1/4 teaspoon salt
2 Tablespoons butter, melted
1 /
4 cup brown sugar, packed
1/4 cup molasses - full flavor
1 large egg
1/2 cup apple cider
3 Tablespoons mashed roasted pumpkin
The Cinnamon Sugar Coating:
2/3 cup granulated sugar
1 1/4 teaspoon ground cinnamon
1 teaspoon ground ginger
1 stick (1/2 cup) butter, melted
Preheat the oven to 350 degrees F. and here we go:
1.
In a medium bowl, mix together the dry ingredients: flour, dried milk powder, cinnamon, ginger, cloves, allspice, baking powder, baking soda, and salt. Set aside.
2.
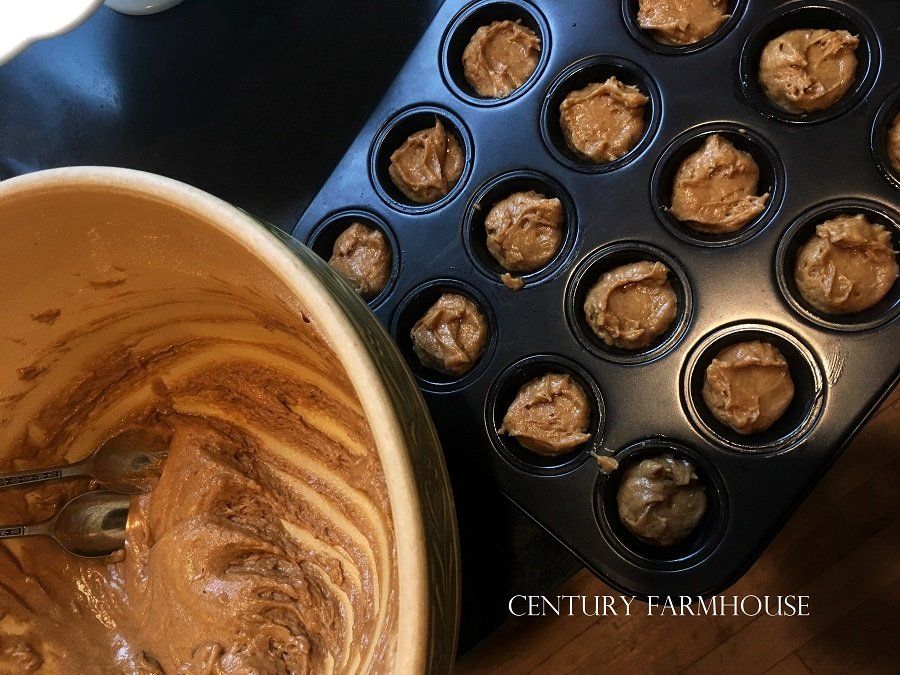
In a separate larger bowl, whisk together the melted butter, molasses, brown sugar, egg, cider, and pumpkin until it is smooth.
3.
Add the dry mixture to the larger bowl and beat with a whisk again until smooth. The contents of the bowl will be much like a cake batter.
4.
Scoop with teaspoons or a small ice cream scoop into the greased compartments of a mini-muffin pan, filling them about 2/3 full. Don't use muffin papers as you'll want to roll the entire little doughnut "hole" in the butter and sugar coating. Depending upon the size of your pan, you may need to fill the pan and bake several times to use up the batter.
5.
Bake for 10 minutes at 350 degrees F, until the little puffs are slightly browned at the edges or until a toothpick inserted in one of them comes out clean.
6.
Immediately after removing from the oven, loosen the puffs from the compartments by slipping a kitchen knife around them and tipping them up to expose the bottoms of the puffs.
Now comes the fun part of coating them with sugar and eating them while they're warm!
The sugar coating:
1.
While the doughnuts are baking, melt the 1/2 cup butter and place in a bowl (or melt it in the microwave in the bowl!)
Mix the sugar and cinnamon and ginger in a separate bowl.
2.
When the little doughnut puffs have been loosened from the pan, roll them first in the butter and then coat with the sugar before placing on a rack to cool. Once they are cooled, store in an airtight container for up to a day.
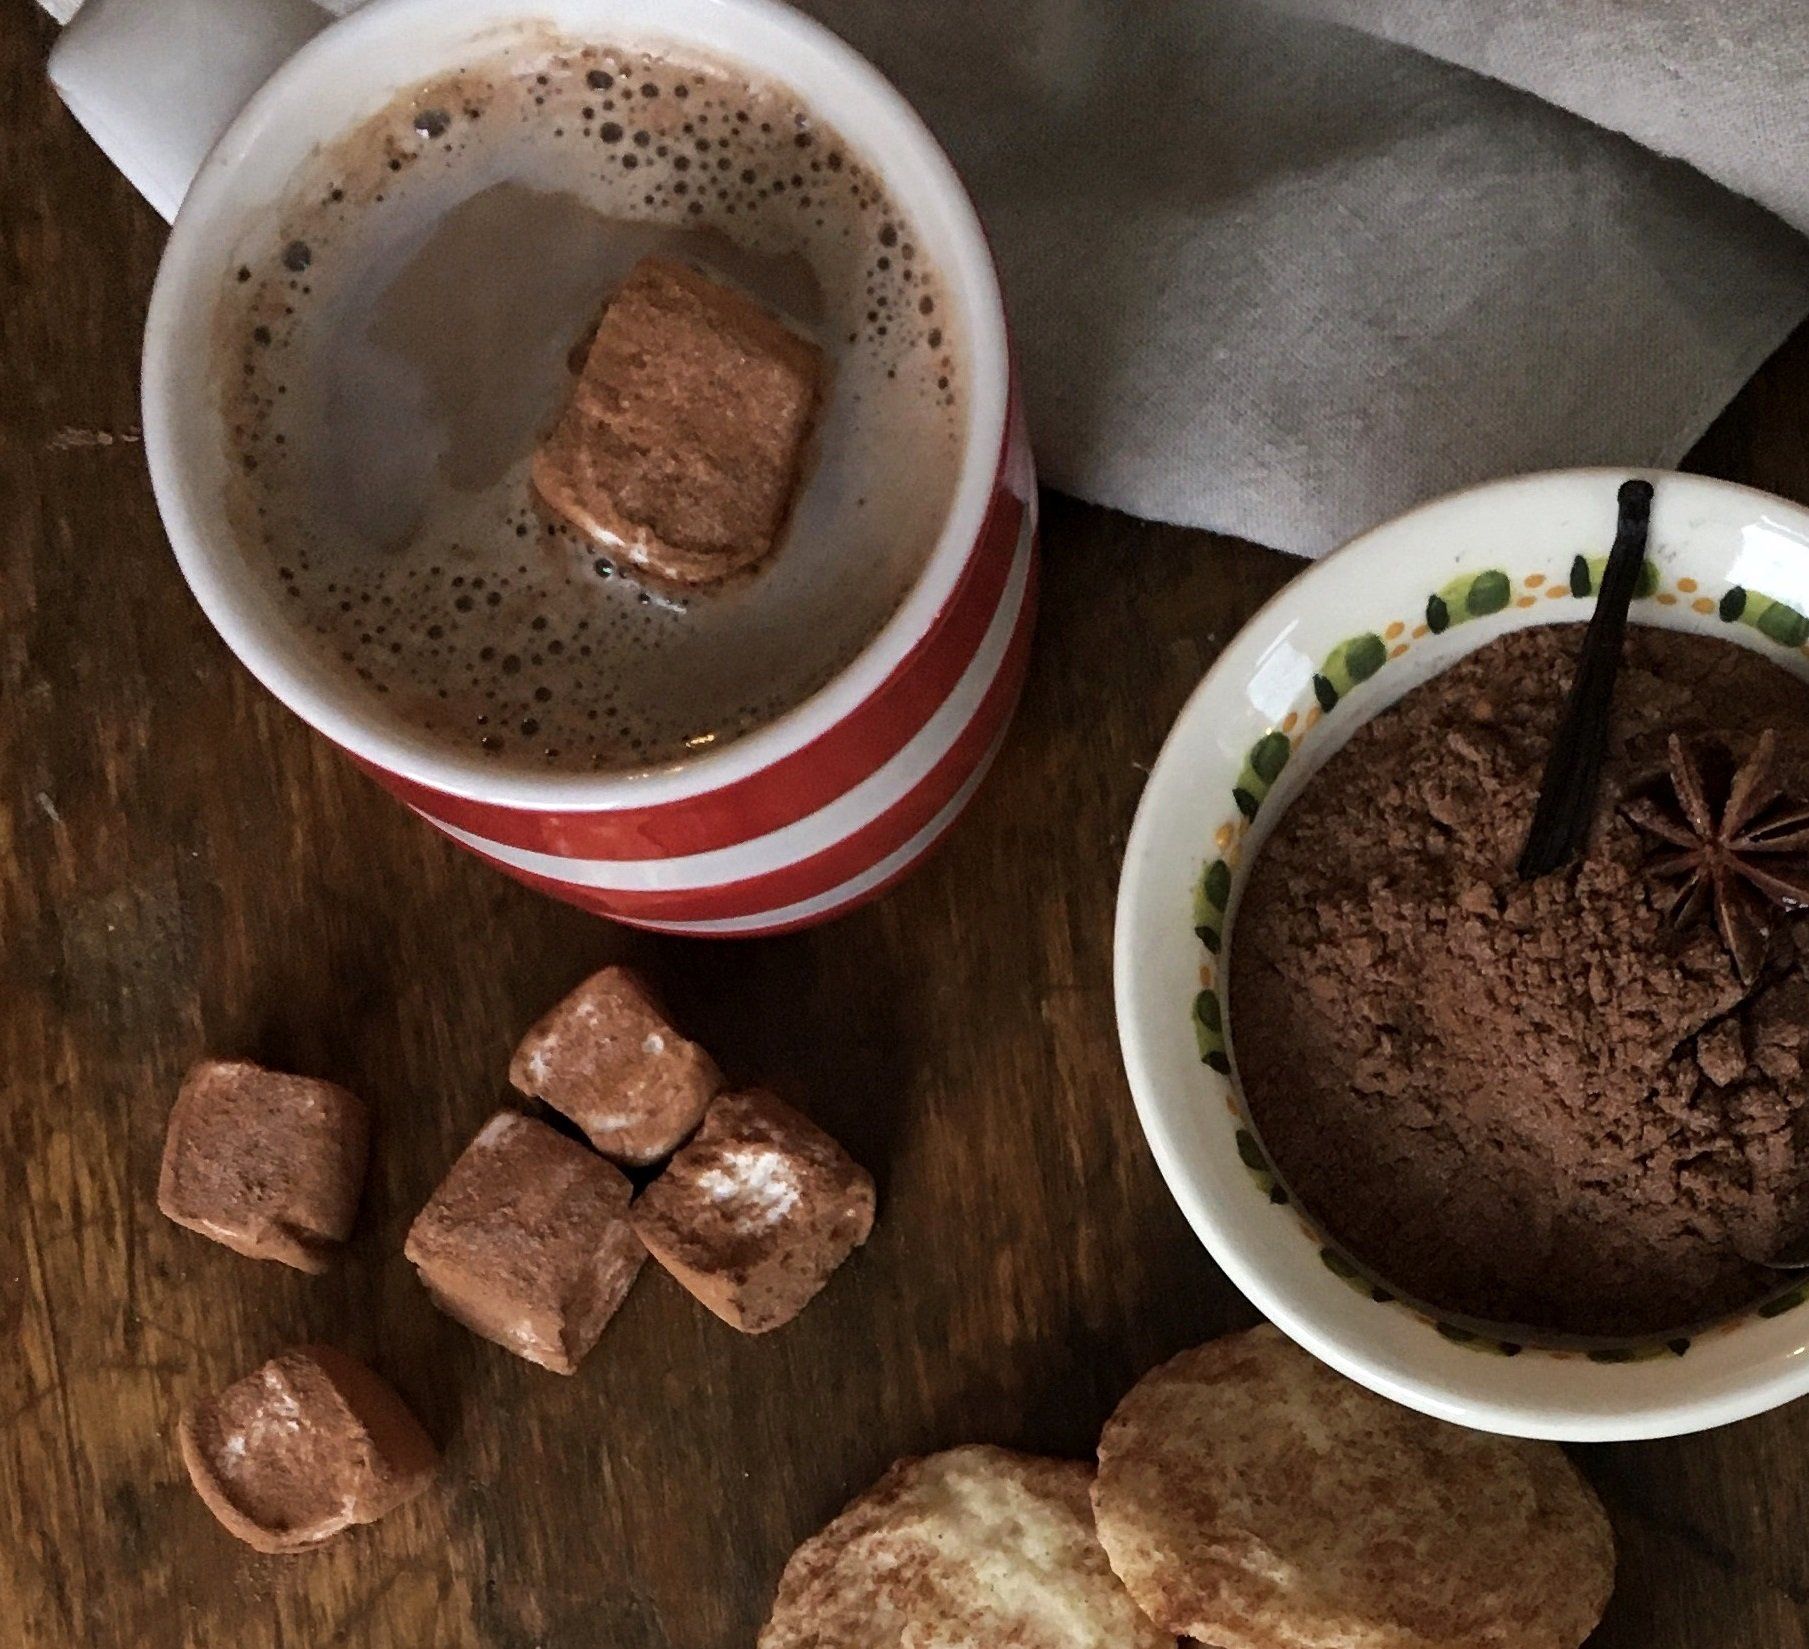
These little doughnut holes taste the best when warm, and are wonderful with a cup of tea or coffee, or chocolate, or cider anytime. They probably won't last a day, but if you have any left over,
freeze them until you are ready to eat them.