Make Chalk!
Making sidewalk chalk is easy and fun for all ages.
The Museum of Wisconsin Art hosted their third annual Art & Chalk Fest
this weekend, and I had the awesome privilege of making chalk with market-goers at the West Bend Farmers' Market yesterday morning. We worked with about 135 kids to create pieces of chalk using simple ingredients. The warmth of the nearly-90-degree sunshine helped to harden the chalks pretty quickly, so the kids were able to use their treasures later in the day.
If you have never attended an art and chalk festival, imagine Leonardo da Vinci drawing the Mona Lisa in chalk on baking concrete, and thousands of people gawking and having a wonderful time watching him. I hope you check the link above to see what all the fuss was about in West Bend this weekend.
Jess Wildes, the marketing director of the Museum, came to the market and filmed the clip above. As a matter of fact, her parents volunteered to help me with the chalk making, and I couldn't have done it without them!
That video above moves pretty quickly, but you get the idea - it's easy! I love to make chalk because it is quite inexpensive, and the range of colors you can create is endless. Here's how it's done:
Let's make chalk:
Materials:
Plaster of Paris
Water
Tempera Paint
Paper cups (we used 3-ounce cups), wood craft sticks, a flat mold, cookie cutters (the mold and cookie cutters are optional)
(I'll share my thoughts about the molds, etc. at the end of this post).
Here's how to make the chalk:
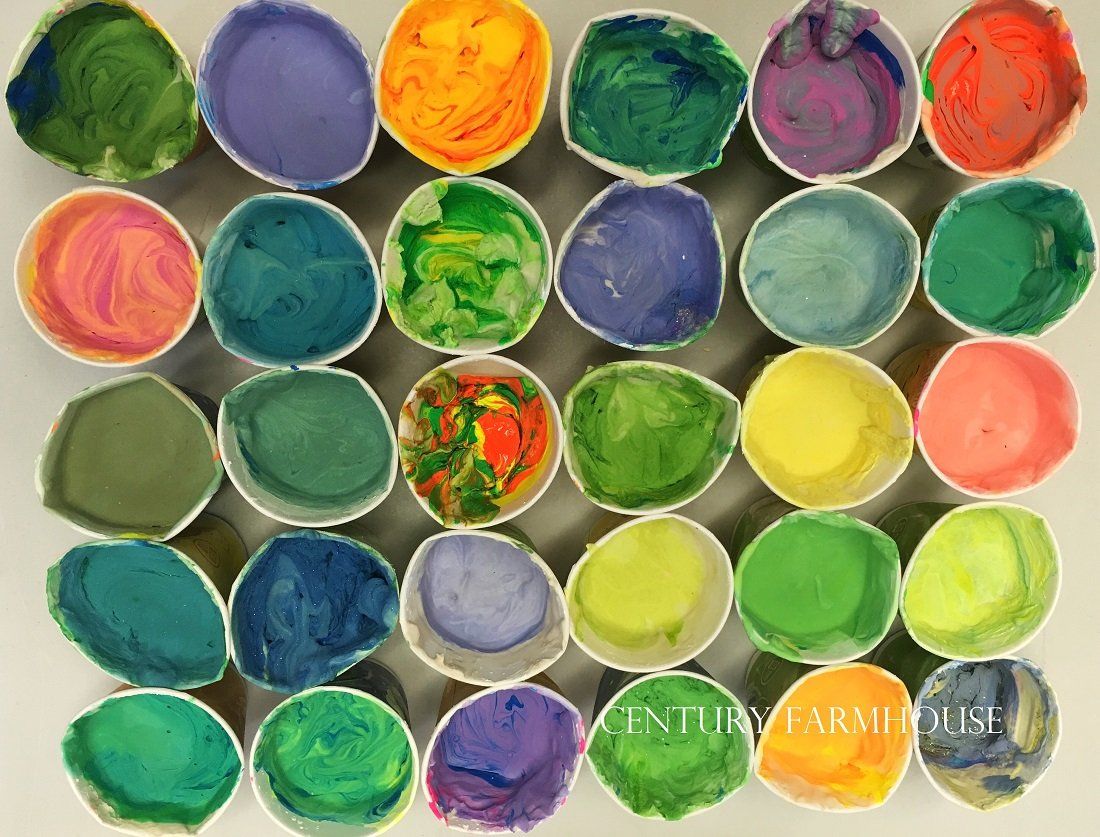
1. Scoop the Plaster of Paris into the paper cup. We used 3-ounce cups and filled them to within about 1/4 inch from the top rim. The resulting chalk fills about 2/3 of the cup.
2. Add water and stir with a wood craft stick to create a plaster slurry that is the consistency of thin toothpaste
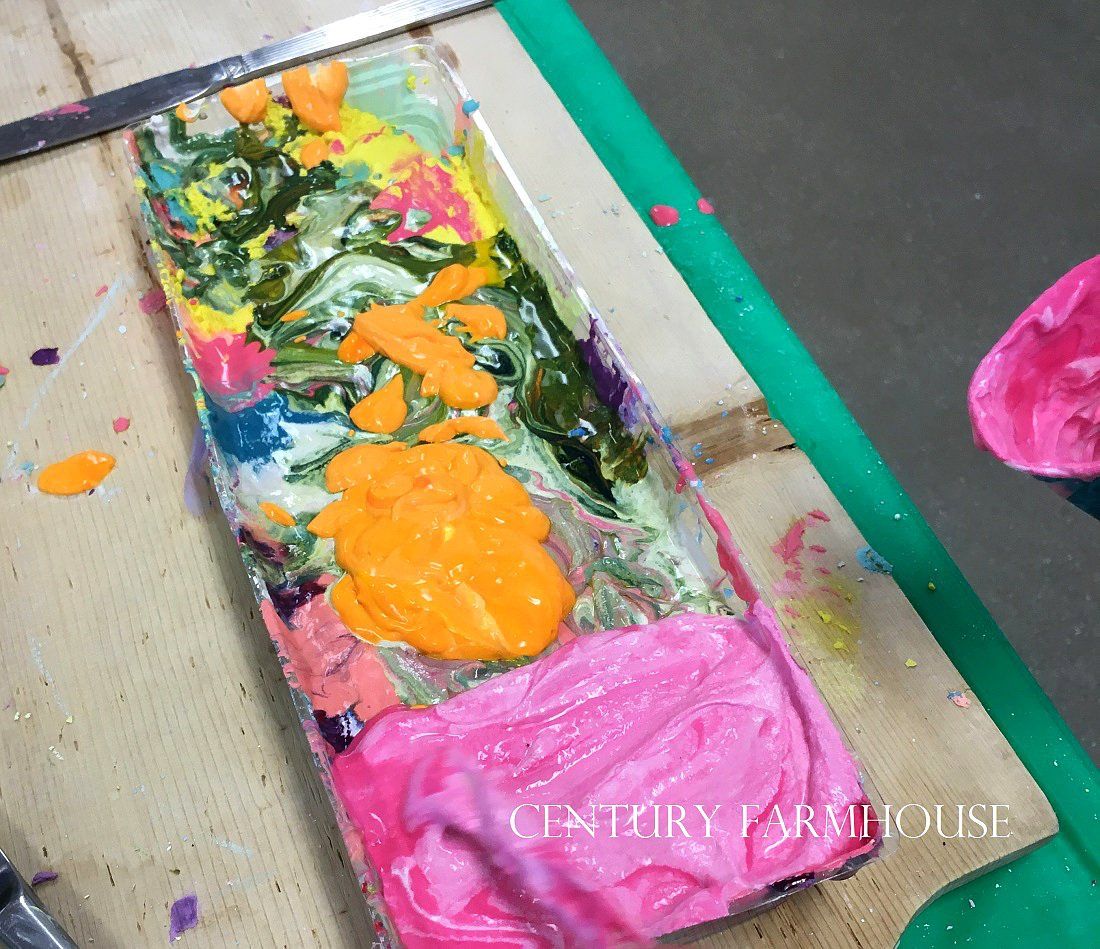
. You might have to play with the amount a little. We used about a tablespoon of water for the 3-ounce cup as described above, and you might have to add a little water or even a little more plaster as you work with the chalk. You'll get the hang of it when you've made a few chalks. Be sure to stir to the bottom of the cup so all the dry plaster is incorporated.
3. Once you have created a smooth, pasty slurry that is the consistency of thin toothpaste, add small squirts of the tempera paints. You can mix colors or go with just a plain color, but work fairly quickly as the tempera causes the plaster to thicken rapidly. If it gets too thick, add a little water so you can just stir it. Play with marbling the colors by adding a small squirt of paint again and stirring just enough to swirl the color in, but not enough to completely mix it. Be sure there is no un-stirred paint as this will dry just as paint, not chalk, and may stain concrete when it is rubbed on it later.
4. Once you have achieved the color you want for your chalk, allow it to dry thoroughly right in the cup. The small pieces we created in the 3-ounce cup dried in just an hour or so in the warm sunshine. It might take a few more hours or even a day or so to dry thoroughly.
5. Peel the paper cup away and you have fabulous sidewalk chalk that you made yourself! If a little paper sticks to the chalk it is of no consequence. Just draw on the sidewalk with it anyway and the paper will wear away almost immediately. Have fun!
Notes:
You can make your chalk in nearly any container. I like to use the paper cups for ease of creating multiple pieces quickly. The paper peels away easily and is mostly biodegradable. Certainly the chalk can be mixed in a recycled container such as a yogurt cup or cottage cheese carton and poured into a mold. Try using the top of a plastic (not styrofoam) egg carton. Add multiple colors and cut it into sticks while it is still soft. Or pour the chalk into a pan and cut it with cookie cutters into fun shapes. You are bound only by your imagination when crafting your own chalks.