Tiny Treasures from the Heart
Learn to make a tiny, pretty Valentine card with a secret pocket for a treasure!

I LOVE tiny cards, especially ones with hidey-holes for secret messages or tiny gifts. The intrigue of tiny-ness must be universal, since everyone I've gifted with these cards loved to see what they contained and kept them just to look at.
Confession time: I didn't design them. Too bad, because they are really fun to create and even more fun to pass on to others and I'd like to take the credit. A number of years ago I was up late working on soap (what else?), and to entertain myself was watching late-night Create Channel (PBS) TV. The show was The Spotted Canary , and these cards, along with other interactive cards, were the highlighted demonstration during that segment. Since then I've created gift cards, birthday cards, Christmas cards, thank you cards, and again, this year's Valentines. Using pretty papers and details that you can create yourself or purchase or collect, you can make gorgeous cards for just pennies. Follow along below to see how they're made. If you think you've seen all this before, you have! The first time I posted these instructions was in 2012 on my old, old blog at www.welcometocenturyfarmhouse.typepad.com.
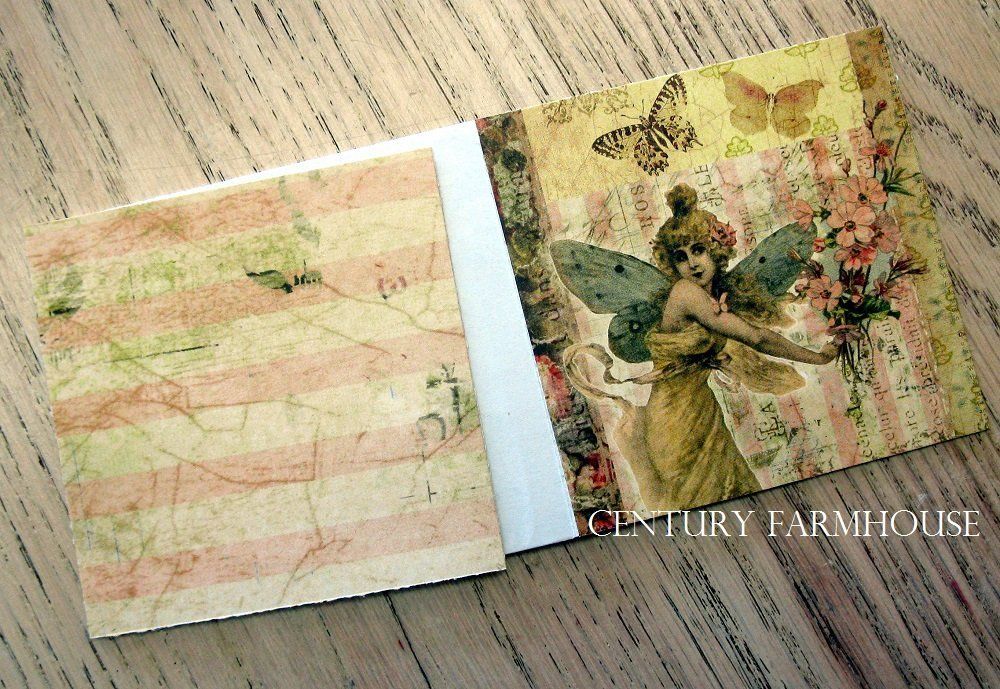
The trick to making these cute little cards is to start with an envelope or three. Truly, working with an odd number of envelopes will result in a card that opens and closes correctly. While you can make these cards with any size envelope, the tiny ones use the least amount of materials and are the most intriguing & fun. The ones used for this project were letterpress envelopes purchased at a local hobby store and were about 3.25 X 3.25 inches square.
So, you will need the following materials:
envelopes of your choice - an odd number of them
pretty papers, ribbon, stickers, buttons, glitter, use your imagination! (even old newspaper can make an interesting card), scrapbooking odds & ends work very well
adhesives: glue dot rollers, glue sticks, spray adhesives work best. Liquid glues can make the paper wrinkle, so use sparingly. hot glue
scissors, paper cutter, crafting shears with decorative blades
patience

If you've chosen to use just one envelope, you can skip this next step. One envelope will result in a card that opens and closes with one pocket for a treat or a message.
1. If you'd like to create a larger card, begin by attaching the flap of one envelope to the lower front of another, and so on, so that all of the pockets are on one side and the glued flaps are on the other. It will be necessary to use more adhesive than the gluey strip on the flap edge, as the entire flap needs to be attached. The bottom edge of the envelope should be lined up with the fold of the next envelope's flap. There will be one flap that is free...which will eventually become the front cover.
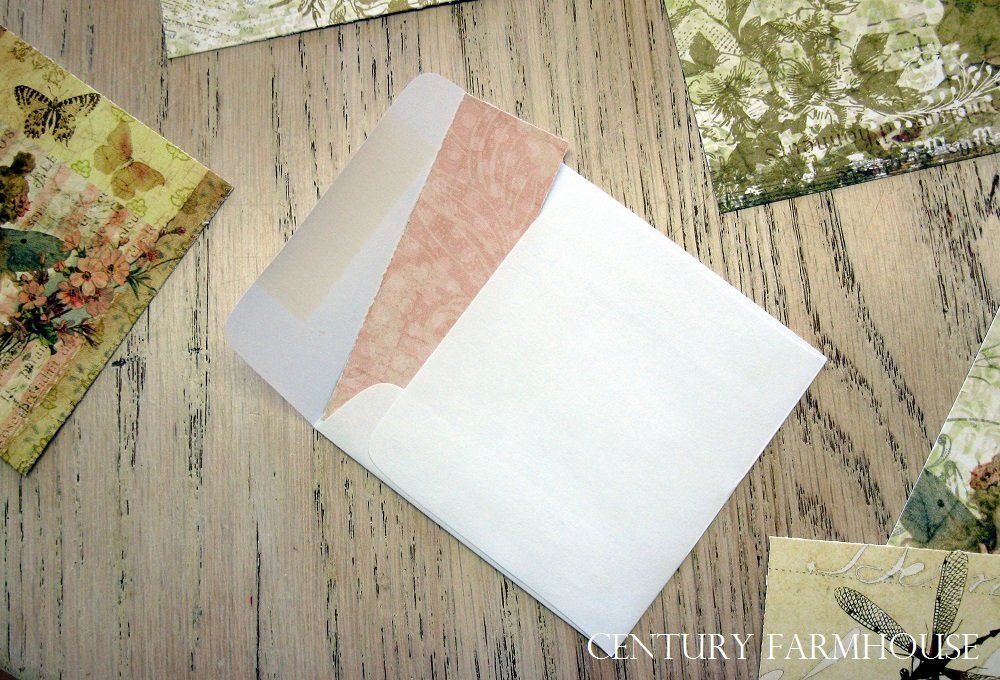
2. Next, choose the papers you'd like to cover the envelope with and cut them to fit the overall exterior dimensions of the main envelope body. You will need one for each side of the envelope, two to cover the envelope flap, and one for the lining. Actually, the lining piece needs to be only about 1/2-inch (about 1.3cm) wider than the back of the pocket opening. Apply the adhesive to the back of the paper lining. Glue the liner into the pocket, first lining up the top edge of it with the fold of the envelope flap, then smoothing it into the pocket. If you are creating a card using multiple envelopes as shown in the top photo, insert the lining piece into each envelope before beginning to cover the outer surfaces. Believe me, it is easier to insert the liner first!!
Next, apply adhesive to the entire inside of the flap, and line up the paper with the flap's fold line. Smooth into place. This is now the inside of the front cover. Turn the card over and apply adhesive to the backside of the flap and the paper. Apply the paper you've chosen for the front cover. Fold the card closed and trim the papers to the edge of the envelope for a neater look. Open the card and attach the paper chosen for the back cover to the flat side of the envelope; trim it, and you're ready to decorate your card!
If you've chosen to create a card using multiple envelopes, insert the pocket liners on all the envelopes first as described above, then cover the pocket sides of the envelopes. Trim as necessary. Create the front cover of the card with the papers attached to the remaining envelope flap as described above; trim. Cover the remaining backs of the envelopes - each one individually - trimming to the edges of each individual envelope by folding the ones around it and cutting any excess paper away carefully.
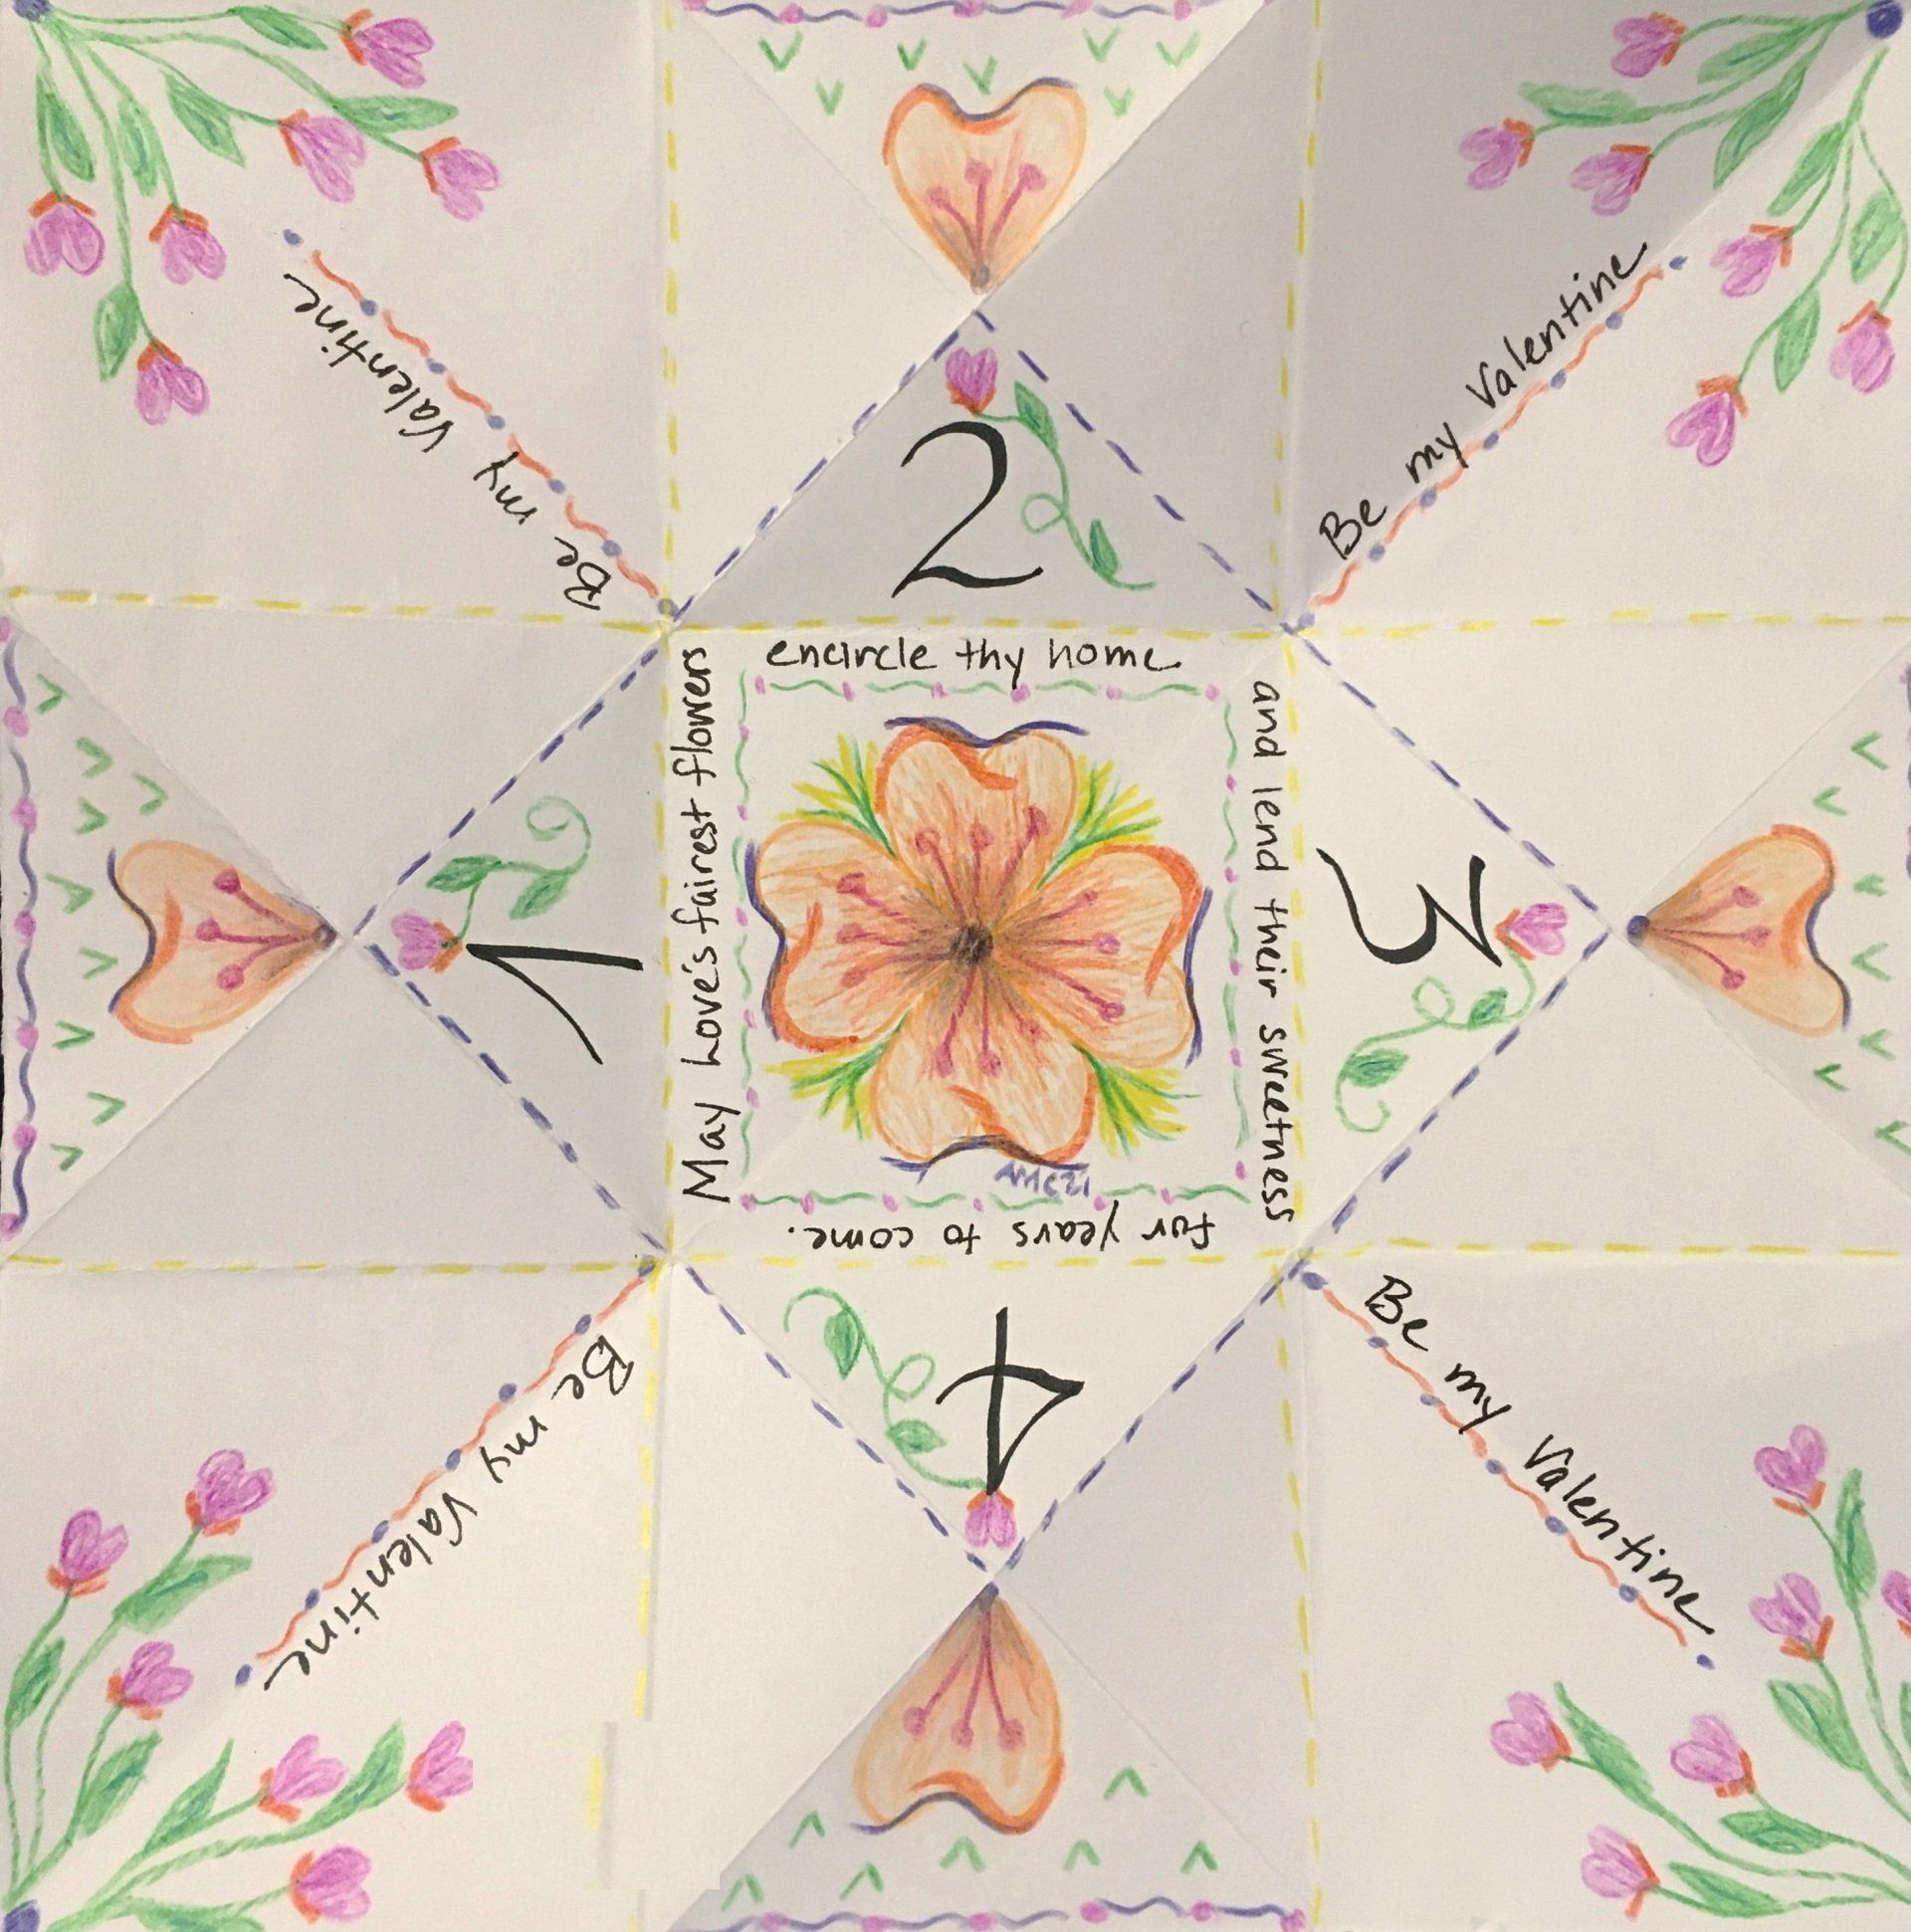
Finish by accordion-folding the card, starting with the front of the card. If done correctly, the outer edge of the front will line up with the outer edge of the back of the card, with all the envelopes folded accordion-style within the booklet. Open the card up to decorate.
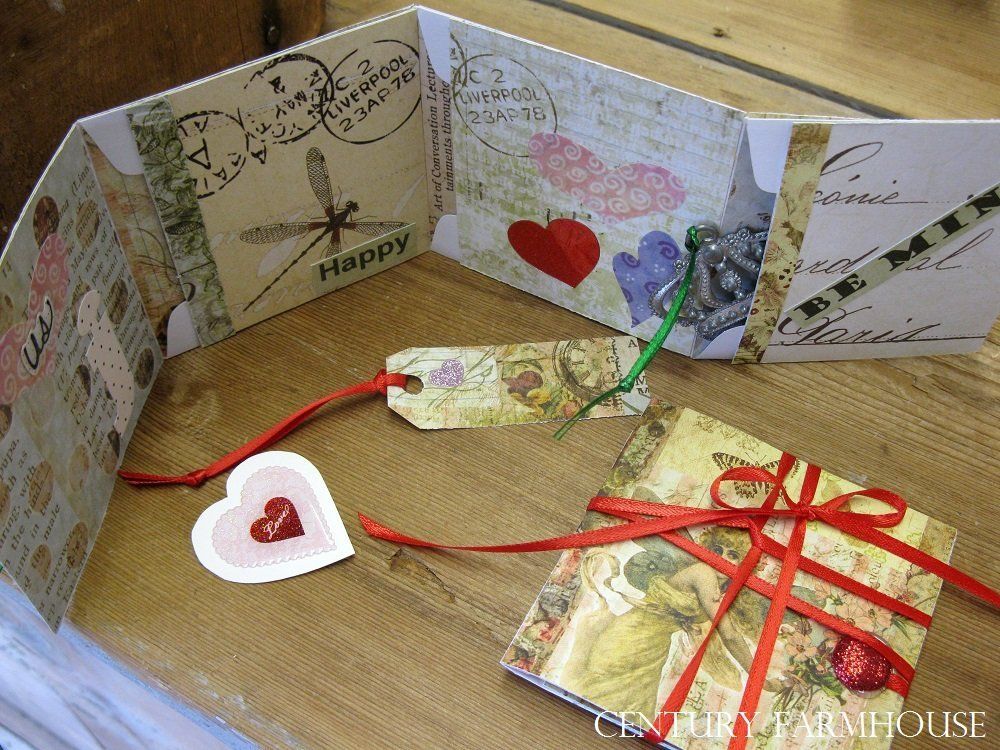
4. To keep your card closed or to make it seem more of a treasure, you can attach a system to keep it closed. A frog -type closure could be attached on the outsides of the front and back. A ribbon loop attached on the back could slide over a button sewn onto the front. Hide the ribbon ends by attaching them between the paper covering and the envelope back - before you put that paper covering onto the envelope! I chose to hot-glue an 18' length of ribbon to the front and another to the back of the card, securing each with a glittering tab or a button. To close the card, wrap the front ribbon over the back, and the back ribbon over the front, and twist back and forth as if you were wrapping a special gift package. Tie with a tiny bow at the front of the card and trim the ribbon.
Who wouldn't love to receive a card like this? Who needs a gift??