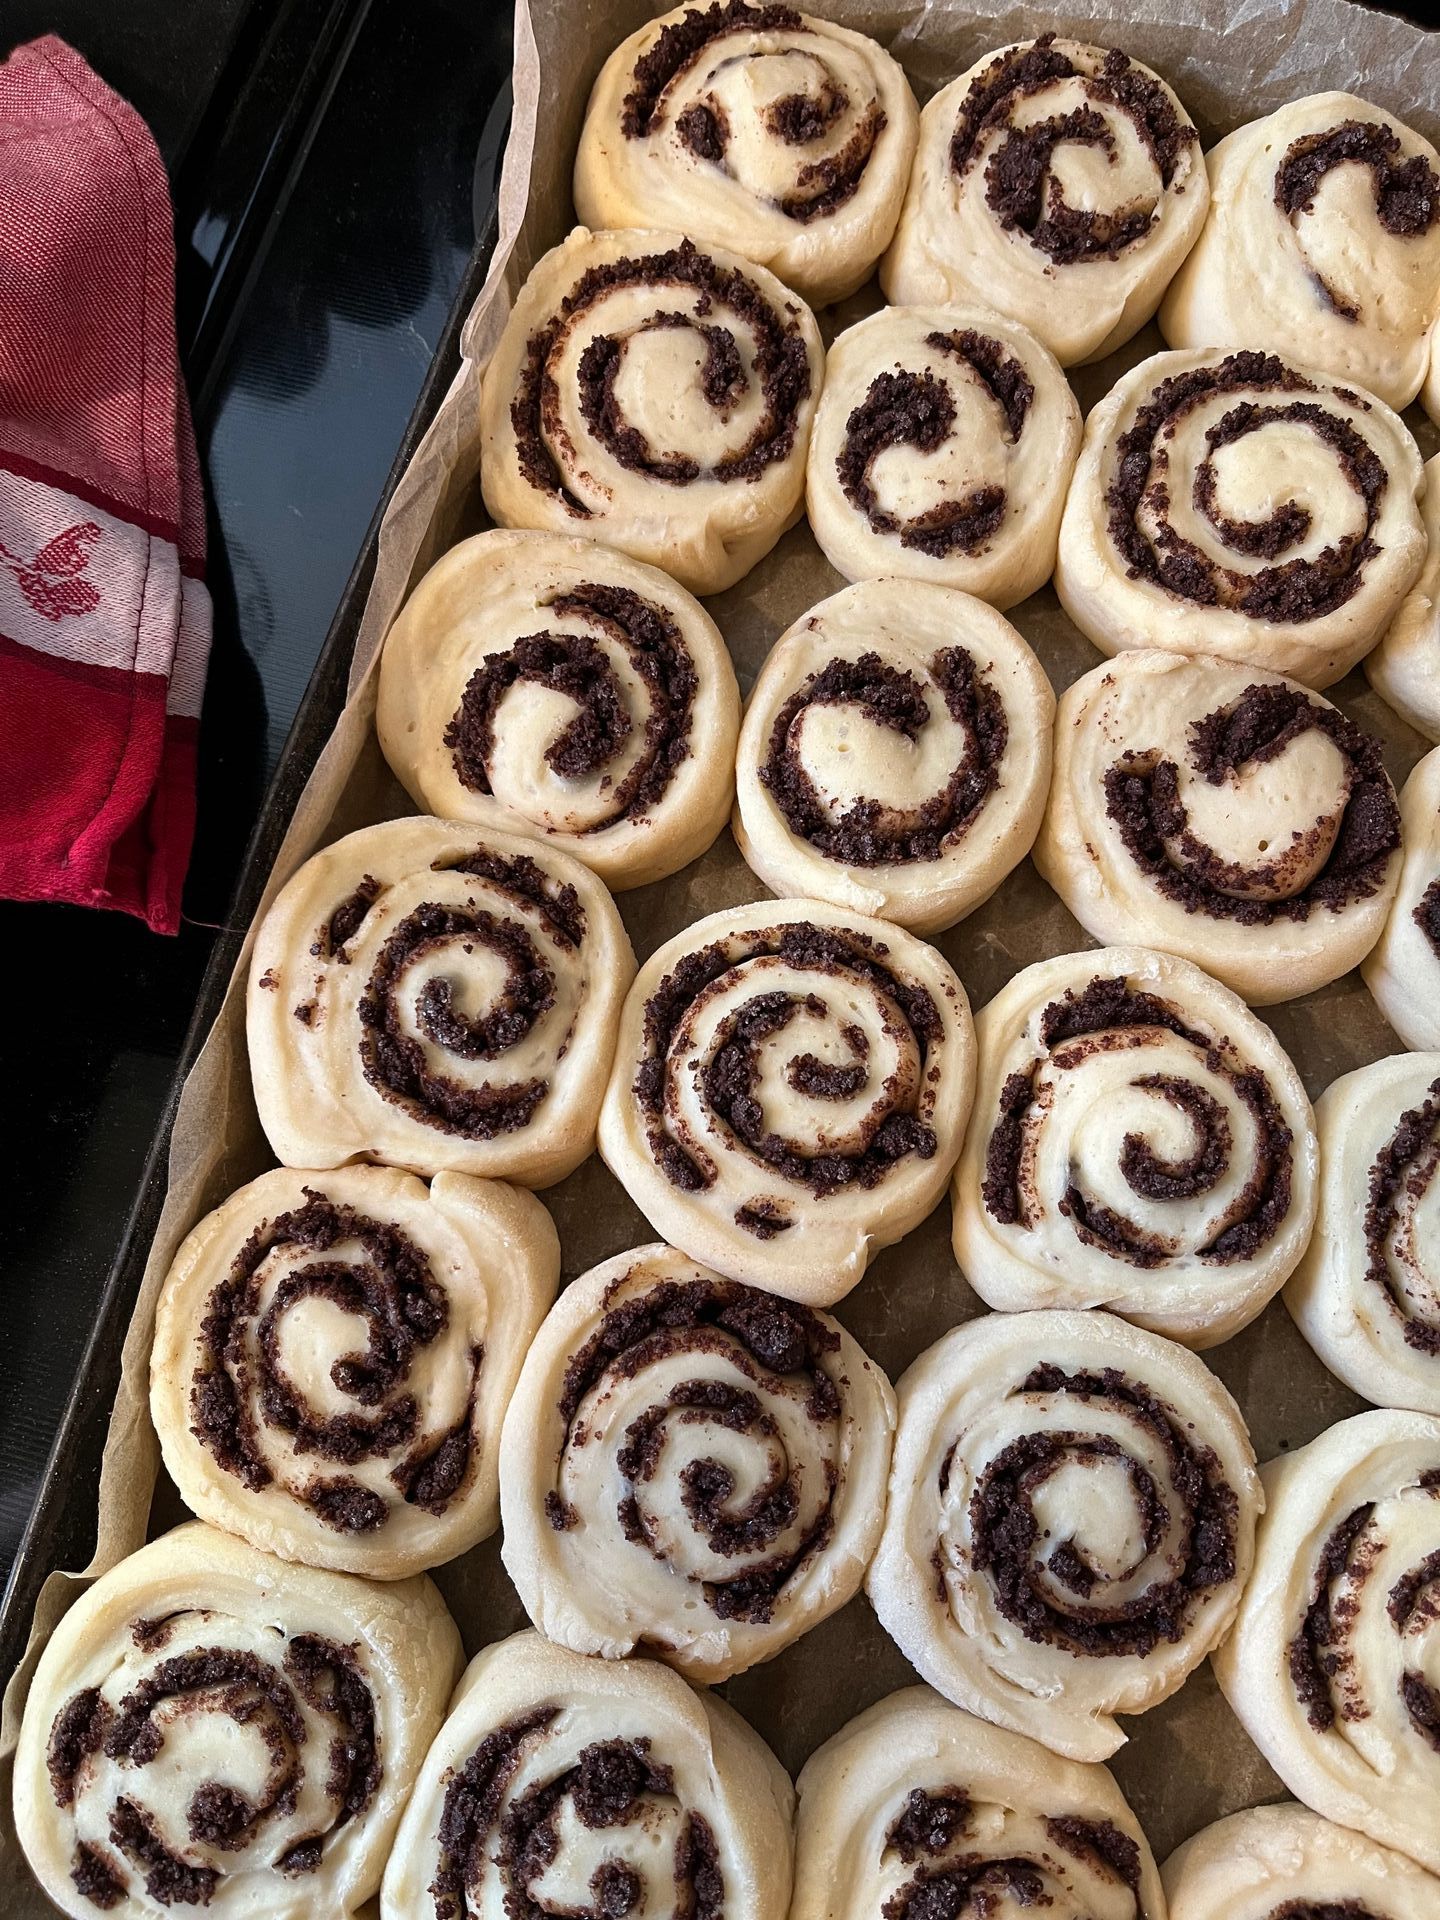
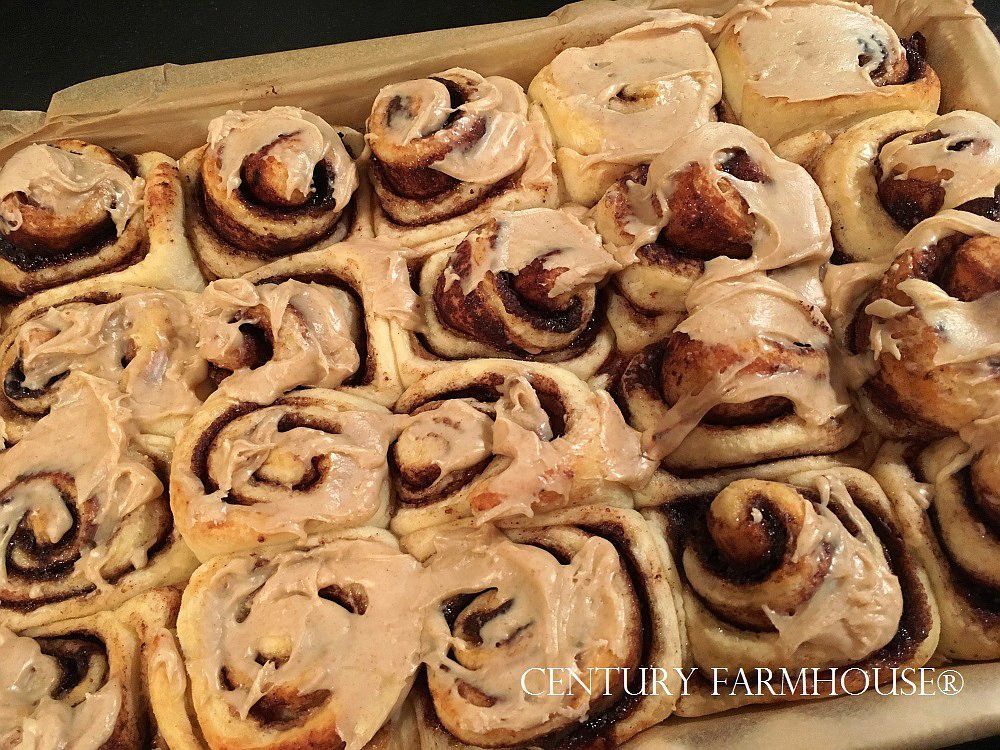
Swirly Cinnamon Chocolate Rolls with Whiskey Vanilla Cinnamon Buttercream
Like a warm, sweet cinnamon roll, only better. I promise.
Oh yeah. They're good.
There is nothing like the early morning scent of cinnamon and chocolate to make me want to get out of bed in the morning. In the case of yesterday morning however, I was the one getting everyone else going. I needed some comfort food in the form of sugar and yeast, so I looked up a story I wrote nearly a year ago for the Washington County Insider
. I knew I'd find the recipe I'd created for these amazing rolls - thank goodness, because I had forgotten to save the recipe in my computer. Ha! Try them and let me know what you think; they take some time, but really are not difficult to make and are worth the trouble. Trust me on this.
Swirly Chocolate Cinnamon rolls with Whiskey Vanilla Buttercream
This makes a HUGE batch of rolls, so plan to make them when you're expecting a crowd, or make ahead and freeze in smaller packets for a month of Sunday mornings. Or just make half the recipe.
Time to create:
Overall, about 3 hours, but each step is done in just a few minutes and then the dough rests. Just stick around the house so you can check up on things every once in a while and can move things to the next step when ready.
Time to bake:
20-25 minutes at 400 degrees F.
What you’ll need to make them really tasty:
For the sweet roll dough:
2 ½ t. yeast
7 - 8 cups of flour, plus more for dusting
2 c. water
4 T. butter
¼ c. sugar
¼ c. powdered milk
1 T. salt
2 eggs
For the filling:
1 c. sugar (I use Turbinado sugar. Plain sugar is fine.)
¼ c. unsweetened cocoa powder
2 t. cinnamon
½ t. espresso powder (optional – the espresso makes the chocolate flavor pop!)
3 t. melted butter
For the frosting:
2 ½ c. powdered sugar
1 t. cinnamon
2 T. Whiskey or whiskey vanilla …. Or just plain old vanilla….
1 T. milk or cream or half & half
2 T. softened butter
Here we go:
Heat the water until just a little too warm to the touch – about 105 – 110 degrees F., place the 4T butter in the warm water to melt or melt it separately. Place the yeast and 2 cups of the flour into a large mixing bowl, add the sugar, powdered milk, and salt and stir together with a wire whisk. Pour in the warm water and melted butter and beat the mixture with the whisk until well blended. Add the eggs and beat it for about a minute, or until the eggs are blended in well and the mixture looks slightly bubbly.
Add 1 cup of the remaining flour, stirring it in with a wooden spoon- then add more flour, about a half-cup, just enough to create a shaggy, sticky mass of dough. Cover the bowl with a towel and let it rest for about ½ hour to allow the flour to absorb some of the moisture from the dough.
After 30 minutes, stir in enough of the remaining flour to create a slightly firmer dough – soft, but not too sticky. Sprinkle flour on the dough and begin to knead it right in the bowl, adding dustings of flour to keep the dough from sticking to your hands or the sides of the bowl, but don’t add a lot of flour at this point as the dough will get too stiff. Knead about 5-7 minutes, until the dough is slightly soft, not sticky, and is smooth and lightly dimpled. Place the dough in a greased bowl, cover with a towel and allow to rise until doubled in size – about 1 hour. It may take longer if your kitchen is a little cool. *a trick for rolls with chewier texture is to mix this at night and allow the dough to rise in your refrigerator while you sleep!
Once the dough has risen, punch it down to release air bubbles, divide it in half and place one of the halves on a flour-dusted board or dough cloth. Roll into a flat rectangle about 1/8 inch thick with a rolling pin. While the dough was rising, you were of course mixing up the dry ingredients of the filling so it would be ready when you are – which is right now! Brush the rolled out dough with melted butter, and spoon-sprinkle half of the dry filling ingredients onto the dough, spreading out to within about ¼ inch of the edges. Starting from the shorter end of the rectangle, roll the dough tightly to create a log. Brush the other short edge of the dough with a little water and use your fingers to stick it to the main log to keep it from unrolling as you cut it. Now, you can cut it into 1 ½ inch pieces with a knife, or you can use my little trick of sliding a long piece of dental floss (center it under the log at the place you want to cut) under the log and criss-cross the ends of the floss tightly together to swiftly cut the log into round, swirly slices. Place the slices cut side down (and up!) in a buttered 13 X9 inch pan or large baking pan with sides. Do the same with the remaining half of that dough, and when you’ve filled up the first pan, fill another, smaller greased pan with any remaining slices you might not have room for. Cover the pans with a towel and allow them to rise for another hour until doubled. Bake at 400 degrees F. for 20-25 minutes or until lightly golden brown. If they brown very quickly, cover with foil part way through the baking time.
Allow to cool, then frost – or not!
Whiskey & Cinnamon Frosting:
Put all the ingredients except the softened butter into a medium sized mixing bowl. Stir until the sugar and the liquids create a very thick ball. If the ingredients seem to dry to create the ball, add more whiskey vanilla to the bowl ½ t. at a time, stirring the thick mixture until it creates a stiff ball. Add the butter and work it into the stiffened ball of sugar, then stir it quickly to create a smooth buttercream frosting. Once the buttercream has been made you can thin it a little with milk or cream to make a glaze if you’d like. The rolls in the photo are frosted with the thicker buttercream. Frost the rolls and enjoy!
Yum.
How to make Whiskey Vanilla:
Ingredients:
1 vanilla bean for every half-liter of whiskey (or other alcohol, such as vodka)
I like to make this in a canning jar, then decant to a pretty bottle when ready. You can make it right in the whiskey bottle if you'd like.
Split the vanilla bean(s) lengthwise and scrape out the seeds. Place the bean(s) into the whiskey, replace the cover, and shake vigorously. Allow the bottle to sit on the counter - more to remind you to give it a good shake every day than anything else - and shake it daily for about three weeks. Decant to a pretty bottle. The vanilla makes a wonderful gift, and is used as you would use commercial vanilla extract in baking and cooking.