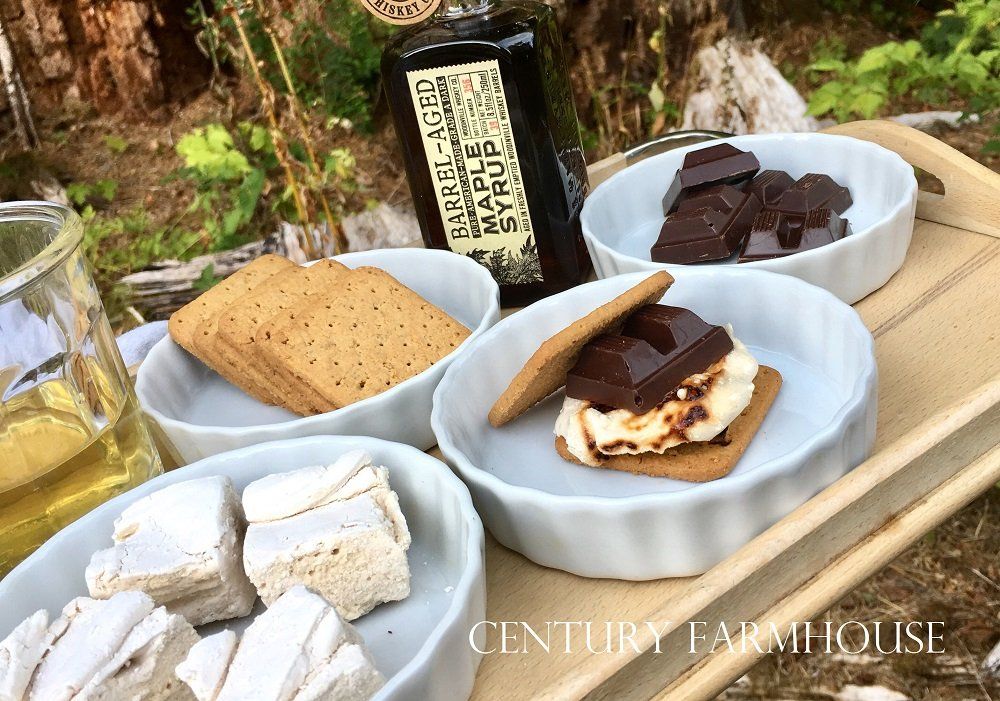
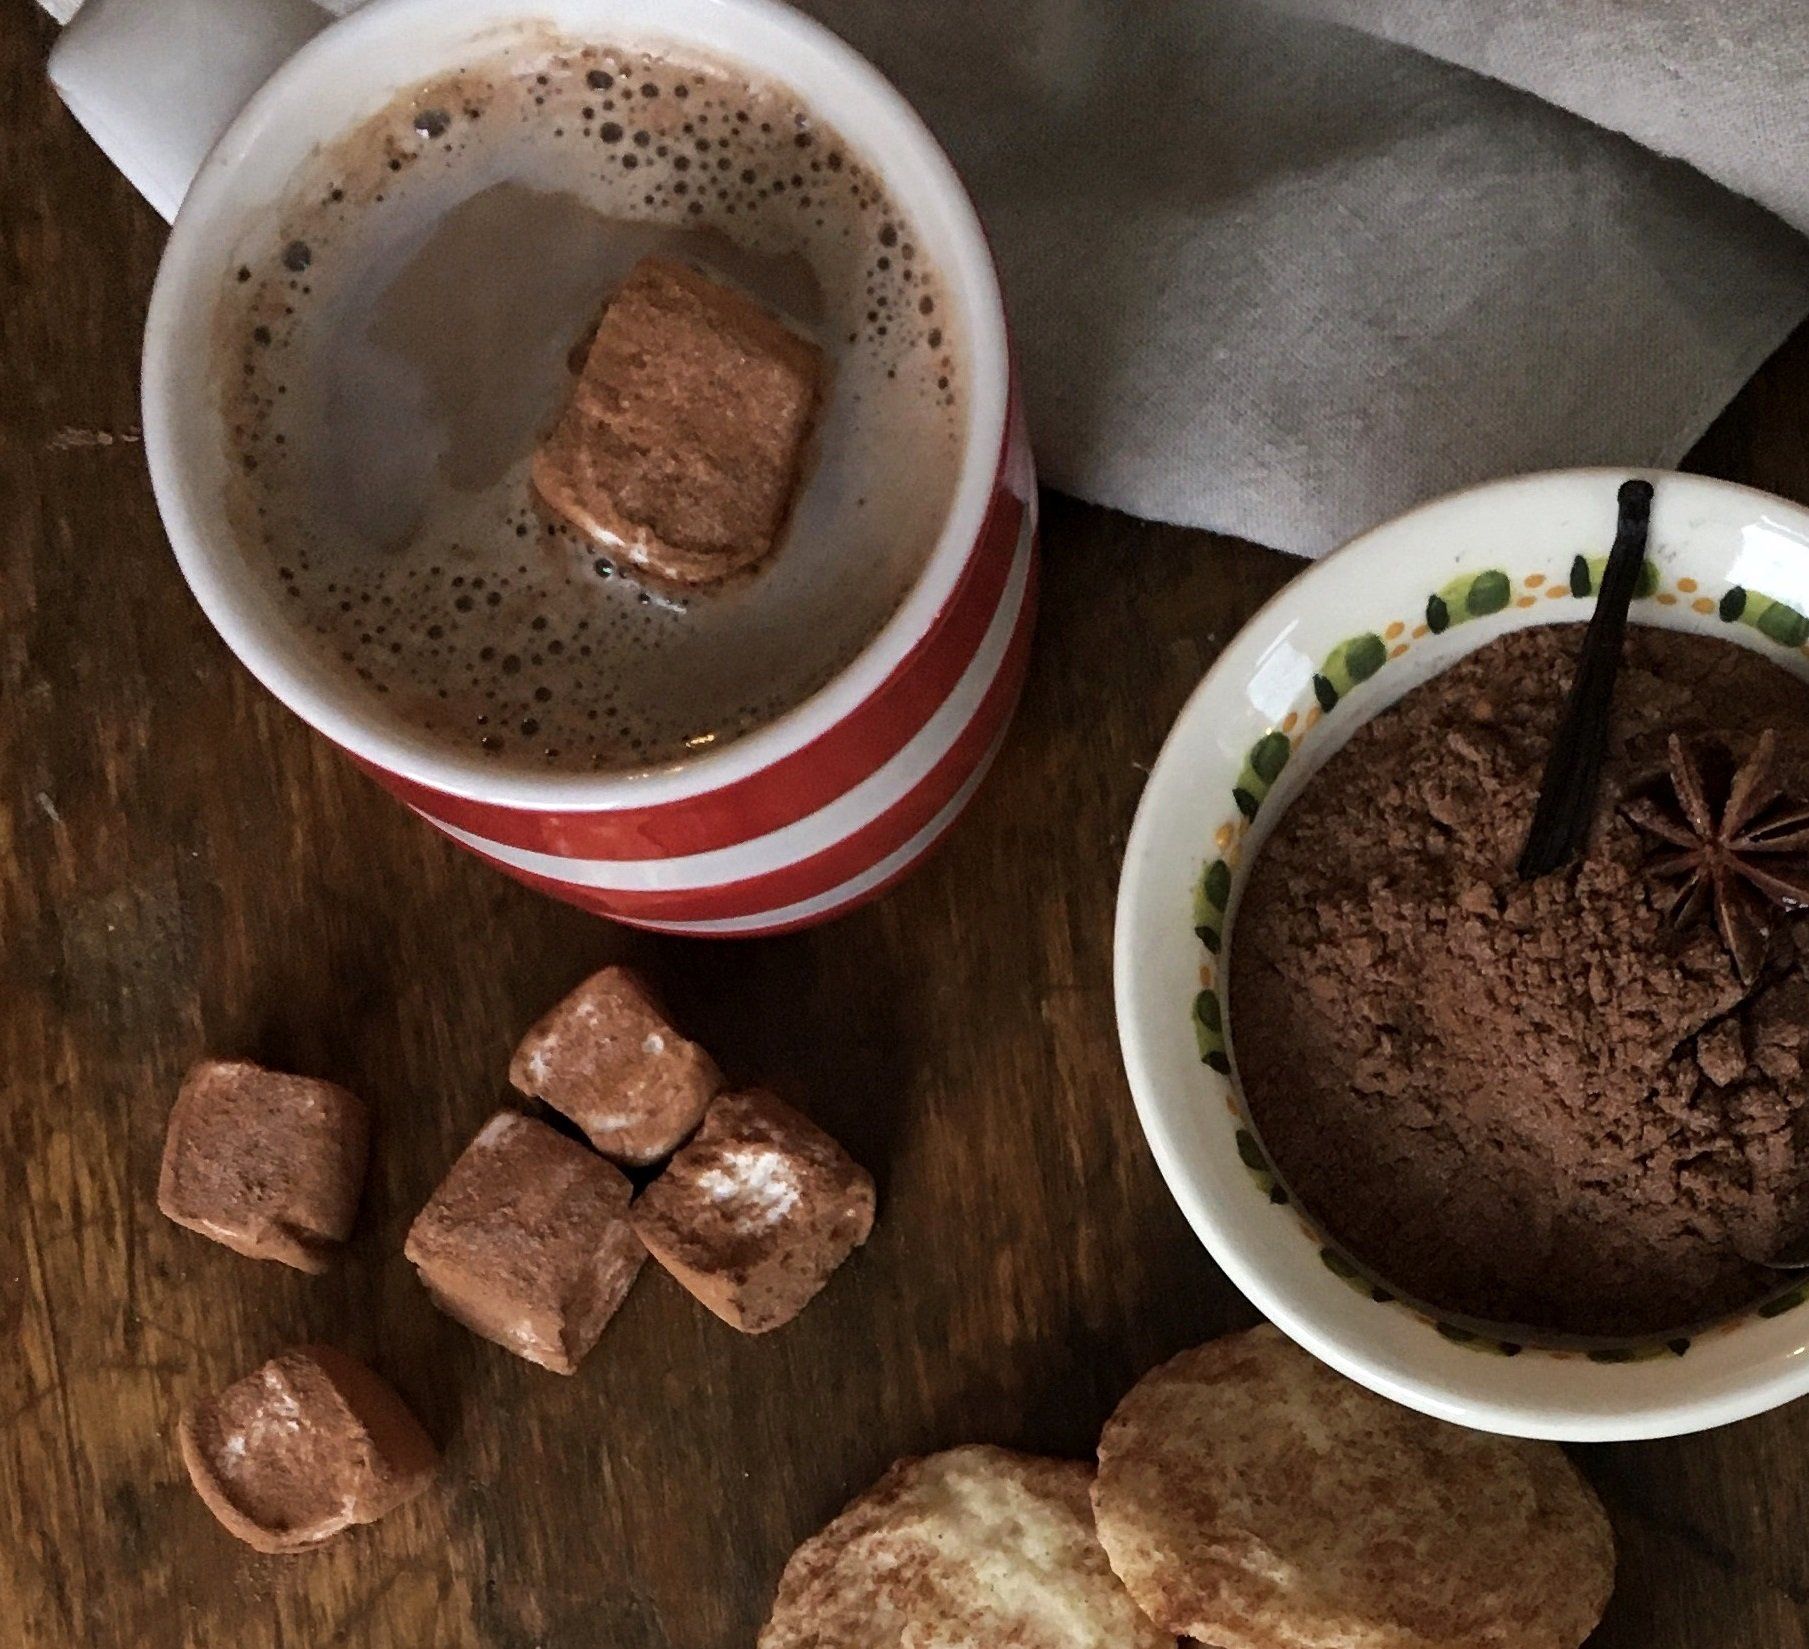
Homemade Maple Syrup Marshmallows
I'm telling you, they are soooooo good!
...The maple trees stand as silent guardians, ushering Spring into our corner of Wisconsin. Over the cacophony of birdsong the prehistoric rasp of the Sandhill cranes on their northward journey fill the air. The squinch of my snowshoes in the deep white stuff languishing on the ground assures me that winter still has its hold on Wisconsin; but the quiet plop of sap, one of my favorite sounds of Spring, celebrates for me the rebirth of the earth. It happens with gentle dignity. It surprises with sudden greening. It delights with warmth and welcome, sunlight and showers...
Unforgettably Gooey Maple Syrup Treats – Homemade Maple Syrup Marshmallows
As you probably already know, the Century Farmhouse maple trees are tapped every spring and the sap is made into wonderful syrup with a deep, dark color and a smoky edge to the flavor. We make it for ourselves, but we have been known to share it once in a while…
I’ve been on mission lately to create a most magnificent marshmallow, and I think I have succeeded. Try that recipe here . If you know me well, you know that my mind is continually coming up with scathingly brilliant ideas about how to make recipes better or how to use unusual ingredients in more unusual ways. So after creating the Golden Marshmallow (not really golden in color –just in flavor!), I began to think of new ways to create marshmallow-y gooeyness with other ingredients. “Why not maple syrup?” I said to myself.
Oh. My. Gooey. Goodness.
Here we go:
Ultra-Maple-y Homemade Maple Syrup Marshmallows
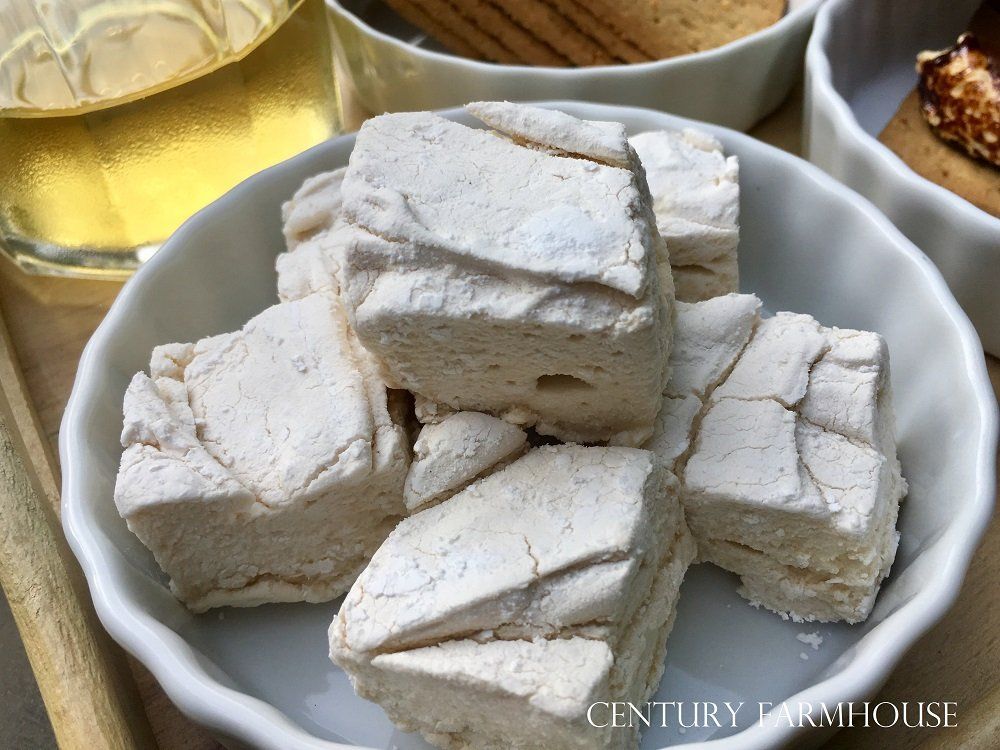
You can absolutely use store-bought maple syrup, but be certain that it is the real stuff from trees and does not contain any filler syrups or sugars. These marshmallows have a slightly grainy texture from the little bit of maple sugar that forms as you heat the mixture to add to the gelatin. And watch out when you toast them up for S’mores – they get brown and gooey very quickly!
Equipment:
Mixer – large bowl, whisk attachment
Medium saucepan
Depending on desired thickness of the marshmallow: 9X9” / 8X12” / 13 X 9” non-metal pan
Scale or measuring cups & spoons, stirring spoon, rubber scraper, strainer, kitchen knife, bench scraper, cutting board
Ingredients:
3 packages or 3 leaves of unflavored gelatin plus ½ cup cold water
1 ½ cups minus 1 Tablespoon sugar
(I like to use caster sugar or superfine baking sugar because it dissolves more quickly, but regular table sugar is fine).
1 cup (8 oz.) real maple syrup *see note above
¼ teaspoon salt
½ cup cold water
Confectioner’s sugar for dusting
Let's make 'em!
1. Prepare the pan: sprinkle confectioner’s sugar over the bottom and sides of the non-metal pan.
You will note that the sugar doesn’t like to stick to the sides of the pan. Here’s my trick: You don’t want to grease the pan as there shouldn’t be grease of any kind on the marshmallows, but…. Place just a dab of neutral-flavored oil such as grapeseed onto a napkin or paper towel and wipe it around the pan bottom and sides. Then take a clean part of that towel and wipe over the pan again so that there is an extremely thin film of oil on the pan. Using the strainer, evenly sprinkle the confectioner’s sugar. Tip the pan as necessary to coat the sides. It works!
2. Place ½ cup cold water in the mixer bowl and evenly sprinkle the gelatin on top. The gelatin will stiffen quite a bit but it melts quickly when the hot syrup mixture is added later.
3. In a heavy, medium-sized saucepan, stir together the sugar, ½ cup cold water, salt and maple syrup. Over medium heat, bring the syrup mixture to a boil, stirring constantly to dissolve the sugar, then pretty constantly to avoid scorching it. This is the part that takes the longest and tries my patience, and it will take a good bit longer for the maple syrup to reach the correct temperature than for other homemade marshmallows. Stir and cook that mixture until it reaches the soft ball stage (240° F / 115° C) on a candy thermometer.
4. Remove from heat.
5. Now take that syrup mixture carefully over to the mixer and pour a little bit onto the gelatin. Begin to slowly beat the syrup/gelatin until the gelatin is completely softened and combined with the syrup. Pour the rest of the syrup mixture carefully into the mixer bowl as you increase the speed of the mixer to medium. When all of the syrup has been added to the bowl, increase the speed to high (I usually go to just below the highest speed) and beat the marshmallows for 15 minutes. Yup! It really will take that long for it to become an amazing treat!
6. Use the rubber scraper to clean off the gooey stickiness from the whisk attachment right into the pan, then scoop or tip the rest of the marshmallow into the pan. Lick the spatula and save the bowl and whisk for later. Use a kitchen knife to spread the marshmallow mixture evenly in the pan. Using the strainer, sprinkle the top of the marshmallow with confectioner’s sugar. Now you can lick that bowl!
7. Allow the giant marshmallow to dry for 12-18 hours.
8. Loosen the marshmallow from the pan, place a cutting board over the pan and tip upside down. With luck your marshmallow will drop right onto the cutting board!
9. Cut with a bench scraper or knife or cookie cutters into desired shapes and sizes. Store in an airtight container. These marshmallows will keep up to a month, but they won’t last that long. They will seem a bit more powdery than the regular homemade marshmallows. That is because a little bit of maple sugar is created as the syrup mixture is heated beyond the temperature at which the sap becomes syrup.
S'mores, anyone??